Boot Camp is an amazing software for using Windows on Mac. This software helps you to install Windows on any Inter-based Mac computer. The installation process is done with an installation disc, you just have to back up your data before using this software. After installation, you can use either Mac OS or Windows on your computer ass Windows is installed in its own partition. Install all the software drivers and it will let Windows to work with the existing Mac hardware of your computer. If you have already installed it, you can upgrade Bootcamp for Windows 7.
Now lets find what you have to do to install bootcamp for windows 7.
Bootcamp for windows 7
Things You Need to Have
- You need to have an Intel-based Mac computer, other Mac computers doesn’t support it.
- The latest version of Mac operating system is recommended for this purpose, it will be better if you have Mac OS X version 10.6 or later.
- A disk drive, it doesn’t matter if it is a built in drive or an external optical drive.
- A compatible mouse and keyboard is also needed for this.
- You can use a 32-bit version of Windows, 64-bit version doesn’t support Boot Camp for Windows 7.
You have to follow simple 3 steps to complete the installation.
Step 1: Open Boot Camp Files
This is the first step to install bootcamp for windows 7. Open your computer and close all other applications. You will find a Boot Camp assistant in the utilities folder, open it. Now you have to create the partition for windows, you can choose the size of the partition according to the drive space on your device. There are two types of partition you can create, one is NFTS, and the other one is FAT. But when you install Boot Camp for Windows 7, you have to select NFTS for windows partition.
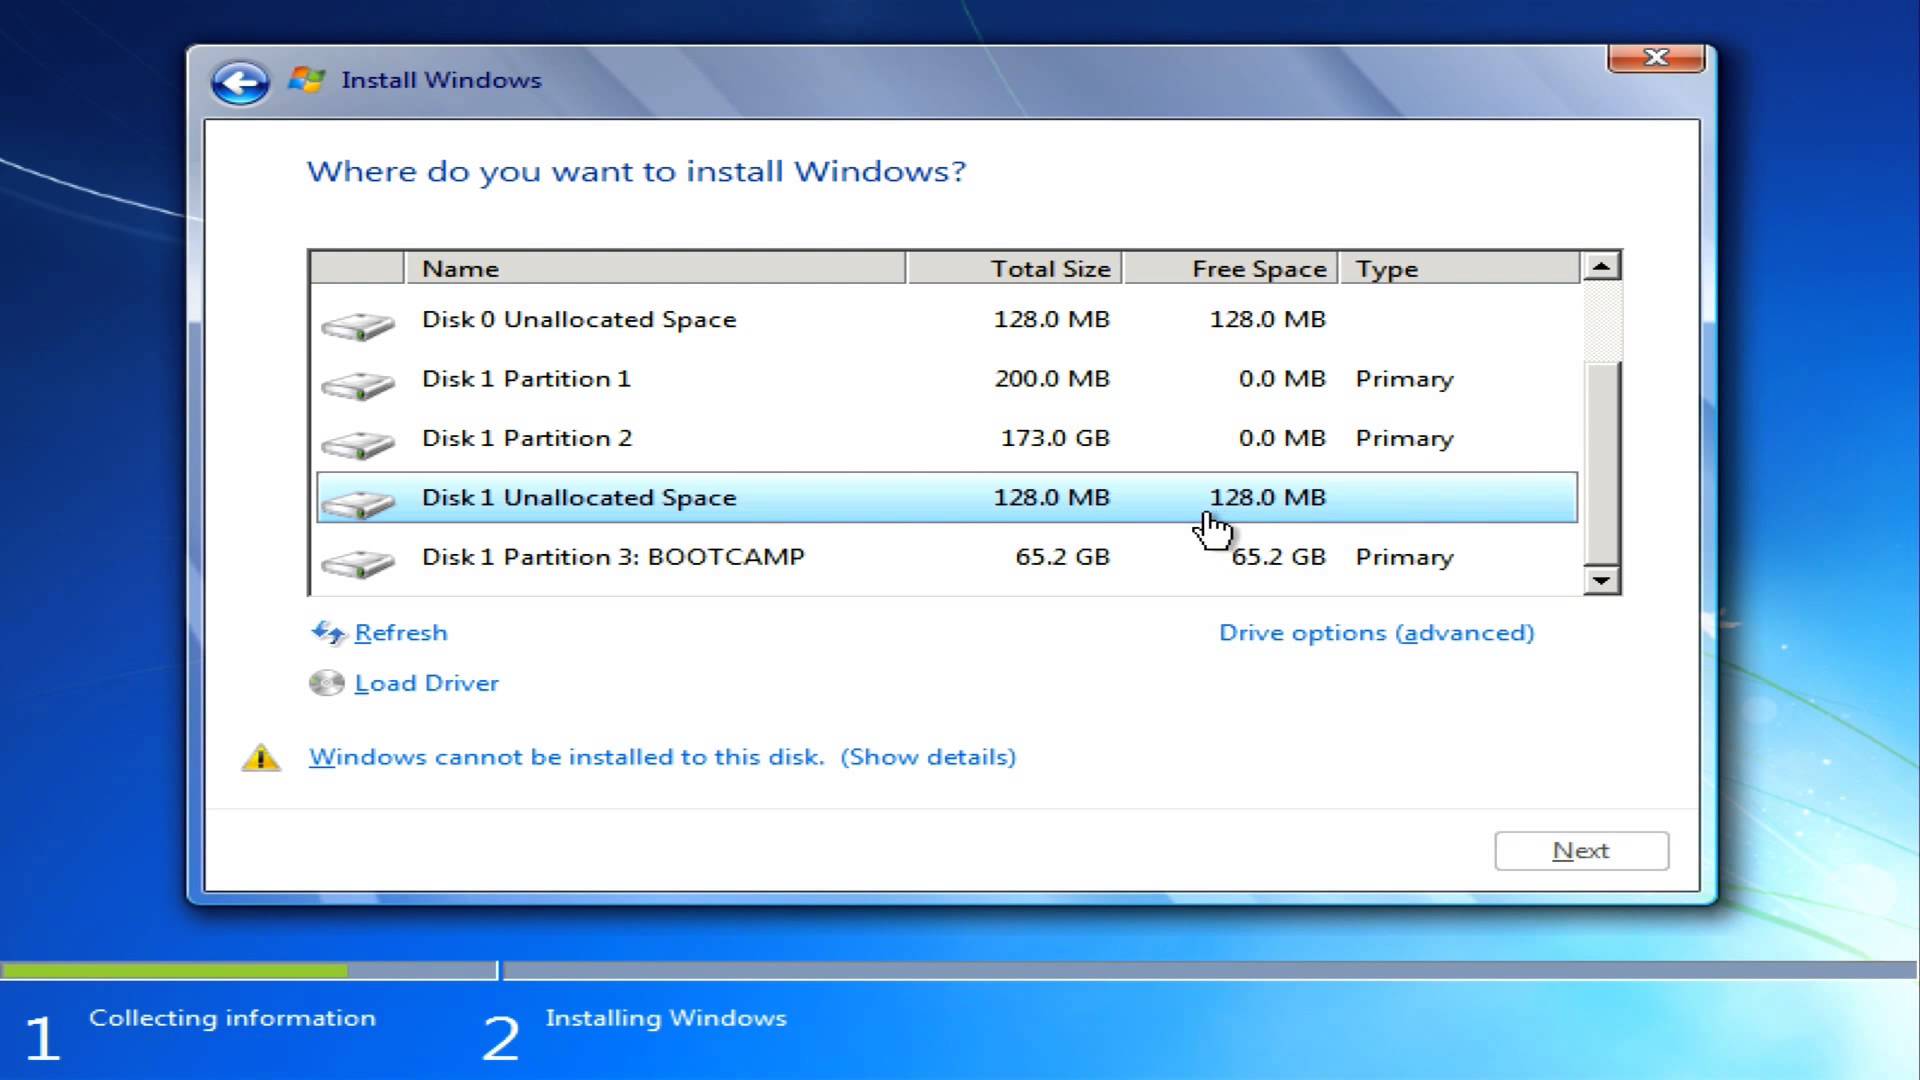
Step 2: Install Windows
This is the main part of installing bootcamp for windows 7. Open the Boot Camp assistant and select “Start the Windows Installer”, then click continue. Insert the windows installation disc in the drive. Now click on “Start Installation”, your computer will start installing Windows 7 from the disc. Now you have select partition for Windows 7 so that you don’t overwrite Mac OS X. Select the NTFS format for making partition. A box will that asks “Leave the current file system intact”, Don’t select this option. After the installation, Your computer will restart automatically.
Step 3: Installing the Boot Camp Drivers for Windows
The final step is installing the drivers of Boot Camp for windows 7. After completing the Windows setup, install other software and drivers for Windows using your existing Mac OS x. It will automatically install the control panel and system tray items of the Boot Camp for Windows 7. Now eject the Windows installation disc and insert the Mac OS X disc, installation will start automatically. Follow the instruction that will appear in front of you and the installation process will be completed.